
Introduction to Microtomy: Preparing & Sectioning Paraffin Embedded Tissue

Microtomy and Paraffin Section Preparation
Creating great paraffin sections using a rotary microtome takes a great deal of skill and experience. "Microtomy and Paraffin Section Preparation" is a great training aid for new microtomists and an excellent refresher for experienced operators. All the essential aspects of cutting paraffin sections are covered, including:
- Safety
- Microtome setup
- Microtome blades
- Trimming, facing and roughing blocks
- Techniques for consistent paraffin sections
- Microtome maintenance
- Common microtomy faults
Steps to Better Microtomy + Flotation + Section Drying
From patient to pathologist, preparing tissue specimens for histological examination requires care, skill and sound procedures. This guide provides practical advice on best practice techniques and simple ways to avoid common errors.
Tips for better microtomy + flotation + section drying are highlighted in this guide. We hope each step provides a valuable reminder of good histology practice and helps with troubleshooting when unacceptable results do occur.
Want to see all 101 Steps to Better Histology?
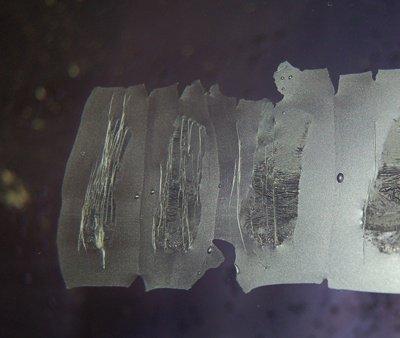
Use High Quality Blades
High quality, sharp blades are always used for cutting.
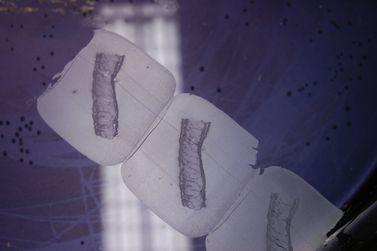
Blades are used for as long as possible, a few “train lines” are considered acceptable.
Optimize Knife Tilt Angle
Knife tilt angle is always optimized for each microtome and blade type.
Knife tilt angle is never adjusted when conditions are changed (different microtome, new blade type, different wax etc.).

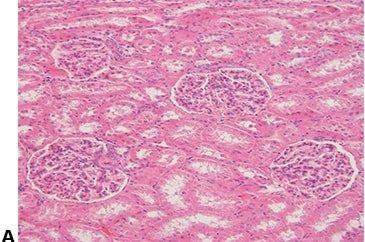
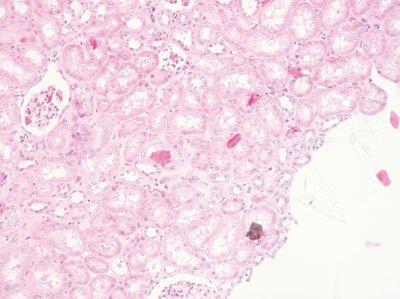
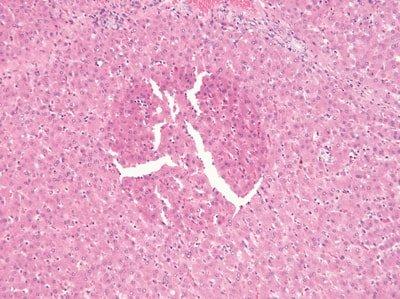
Carefully Trim Blocks
Blocks are carefully trimmed to expose tissue. The last few sections are always cut at what will be the final thickness to polish the block face.
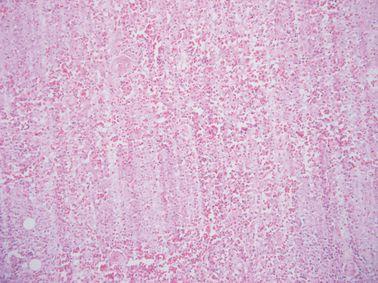
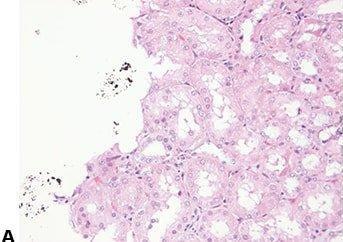
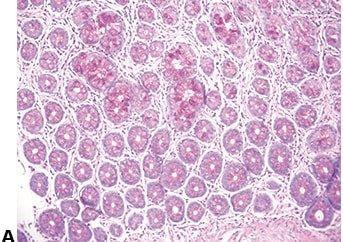
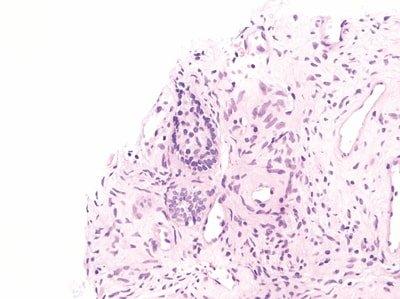
Blocks are roughly trimmed to save time. The surface is not polished before taking final sections. This often produces a “moth-eaten” appearance in the final section, which is full of small, ragged holes.
Avoid Freezing Damage
Blocks are chilled on a cold wet surface and are always cold when cut (the surface of melting ice is excellent).
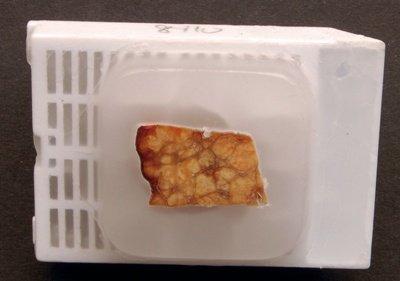
Blocks are frozen before cutting. This sometimes causes the blocks to crack.
Use Cold Blocks
Blocks are always cold when cut.
There is sometimes a delay before final sections are cut from a block. The block may be warm, and this may result in excessive compression of sections.
Cut Sections Slowly
The final sections from each block are cut gently with a uniform, slow rotation.
Sections are cut as quickly as possible with a rapid rotation, in the belief that “any section compression will be overcome on the flotation bath.”
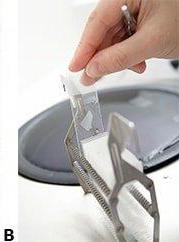
Use Clean Water
The water in the flotation bath is replaced regularly.
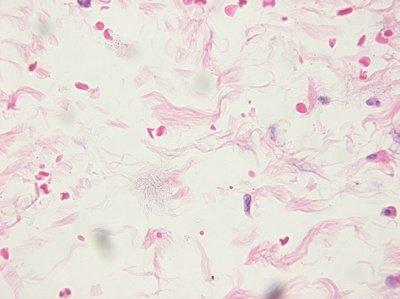
The water in the flotation bath is topped off regularly but replaced only occasionally. Any contaminants in the bath may end upon the slide under the section (fungi, molds, etc.).
Ensure Slides are Clean
The cleanliness of slides is always checked before they are used. Handling of slides is kept to a minimum to avoid contamination with squamous cells prior to flotation.
Slides are not checked for cleanliness: “As long as the sections stay on the slide during staining, we consider them to be satisfactory.” Dust, organisms and other contaminants can spoil an otherwise good slide.
Avoid Cross-contamination
The water surface is always skimmed between specimens to avoid contamination of one section with cells from another.
The water surface is not skimmed between every block. This can result in specimen-to-specimen contamination which can cause confusion and even an inaccurate diagnosis.
Avoid Contamination with Squames
Care is taken not to brush hair or hands while floating-out sections (squames can contaminate sections).
“Some of our staff produce slides containing many squames. They seem unaware that this can be avoided.”
Don’t Float from Multiple Blocks
Sections from more than one block (case) are never simultaneously floated on the water bath.
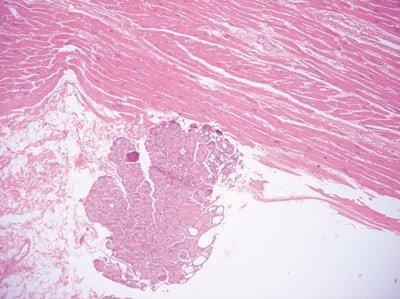
Sometimes sections from two or more blocks (cases) are left floating-out simultaneously. This is a dangerous practice that can lead to inaccurate identification of specimens. There is a particular risk when the sections happen to be from the same type of specimen.
Check Water Temperature
Flotation bath temperature is carefully checked. A temperature 4–5°C below the melting point of the wax is optimal. Sections should readily flatten, but the wax should not melt.
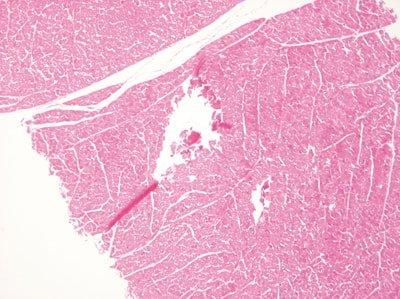
If sections are left on the flotation bath for more than 15 seconds, the wax melts. Although this may seem to make the process faster, it can rapidly cause over-expansion and tissue and cell damage.
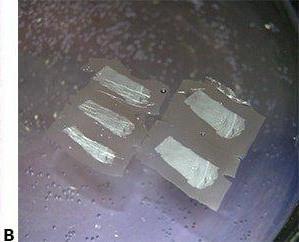
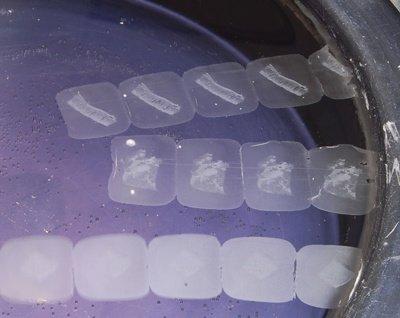
Avoid Wrinkles in Sections
Sections flatten readily on the flotation bath.
Sections never quite flatten on the flotation bath. The bath may be too cold, and the sections may remain wrinkled when picked up on the slide.
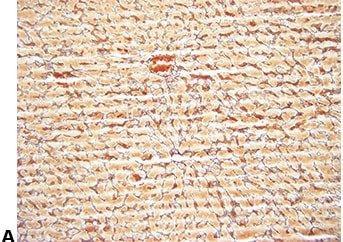
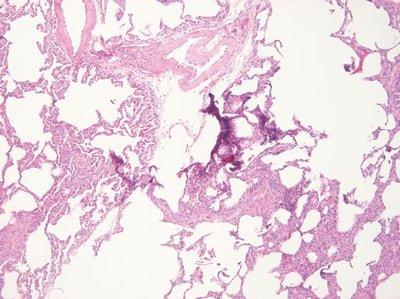
Avoid Over-expanding Sections
Sections are left on the flotation bath for just long enough to flatten then promptly picked up on a slide.
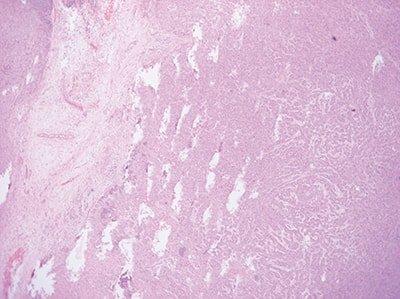
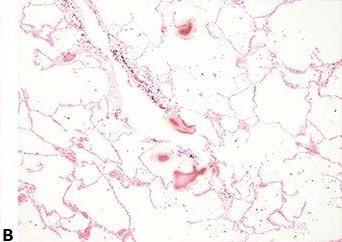
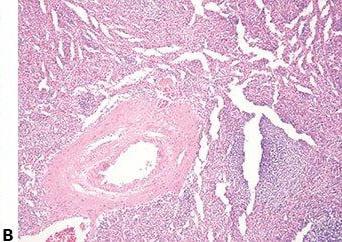
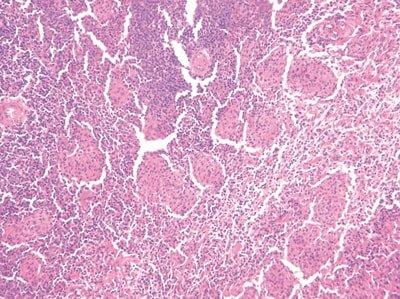
For convenience, some sections are left for extended periods on the flotation bath. This can cause over-expansion and tissue damage (particularly to delicate specimens such as lymphoid tissue).
Don’t Damage Floating Sections
Extreme care is taken to avoid damaging floating sections when mechanically removing wrinkles with a brush or forceps.
Wrinkles are vigorously removed from floating sections with a brush or forceps. Macroscopic and microscopic damage can easily be caused by this procedure.
Carefully Choose Sections
The first one or two sections in a ribbon are never picked up on slides.
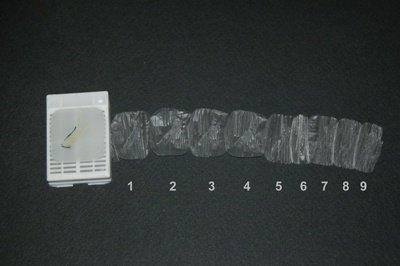
The first and second sections in a ribbon are selected for mounting because they look better than the later sections. They look better because they are invariably thicker due to the expansion of the cold block during the first couple of passes across the knife.
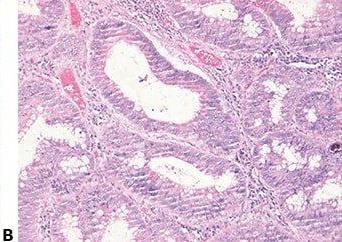
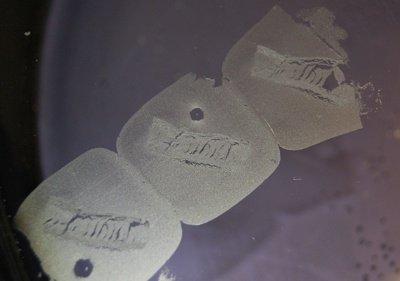
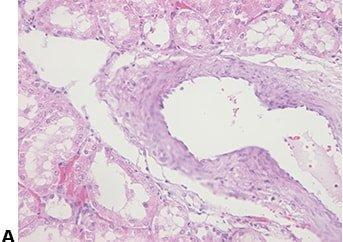
Prevent Bubbles Under Sections
Care is taken to avoid the formation of air bubbles in the flotation bath. Any visible bubbles are dislodged before the sections are laid on the water.
Small air bubbles in the flotation bath are ignored. Any bubbles that are trapped under the section seem to disappear as the section dries. Although the bubbles may seem to disappear, the areas in the section above the bubble are often distorted and are likely to float off during staining.
Prevent Section Lifting
The use of “sticky” (charged) slides or section adhesives such as AAS is considered and used appropriately.
Sometimes sections float off during staining (particularly during antigen retrieval for IHC or when methods require the use of heat). Charged slides or section adhesives are required in these circumstances.
Drain Before Drying
Sections are drained briefly before being placed in the slide dryer or onto a hotplate.
Sections are not drained properly before being dried horizontally. Sections move on the slide and sometimes do not dry flat.
Monitor Drying Temperature
The temperature of the slide dryer is carefully monitored.
Sometimes the slide dryer is very hot. Excessive heat can produce hot spots in sections and cause uneven staining.
Dry for Appropriate Time
The minimum and maximum slide drying time is monitored.
Slide drying times vary considerably. Extended drying at higher temperatures may be detrimental to sections.
About the presenter
Geoffrey Rolls is a Histology Consultant with decades of experience in the field. He is a former Senior Lecturer in histopathology in the Department of Laboratory Medicine, RMIT University in Melbourne, Australia.
Related Content


Leica Biosystems Knowledge Pathway content is subject to the Leica Biosystems website terms of use, available at: Legal Notice. The content, including webinars, training presentations and related materials is intended to provide general information regarding particular subjects of interest to health care professionals and is not intended to be, and should not be construed as, medical, regulatory or legal advice. The views and opinions expressed in any third-party content reflect the personal views and opinions of the speaker(s)/author(s) and do not necessarily represent or reflect the views or opinions of Leica Biosystems, its employees or agents. Any links contained in the content which provides access to third party resources or content is provided for convenience only.
For the use of any product, the applicable product documentation, including information guides, inserts and operation manuals should be consulted.
Copyright © 2026 Leica Biosystems division of Leica Microsystems, Inc. and its Leica Biosystems affiliates. All rights reserved. LEICA and the Leica Logo are registered trademarks of Leica Microsystems IR GmbH.