
An Introduction to Specimen Processing

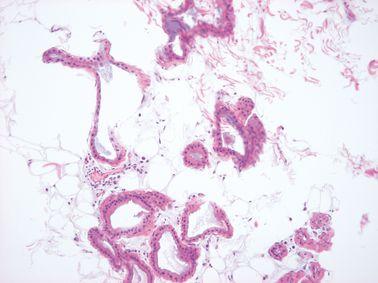
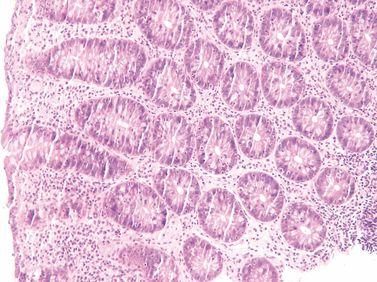
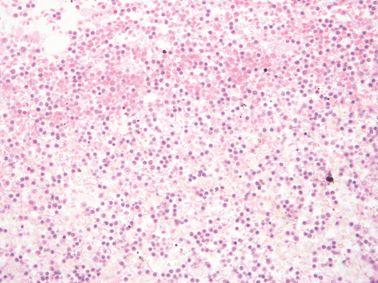
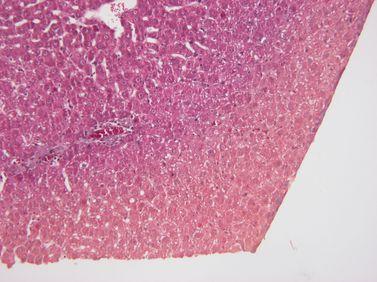
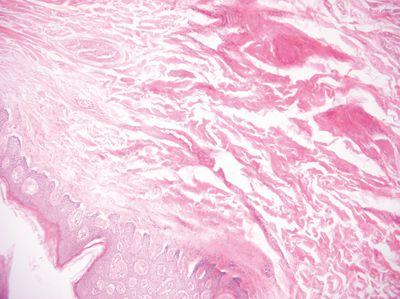
Microscopic analysis of cells and tissues requires the preparation of very thin, high-quality sections (slices) mounted on glass slides and appropriately stained to demonstrate normal and abnormal structures.
Most fresh tissue is very delicate and easily distorted and damaged, and it is thus impossible to prepare thin sections from it unless it is chemically preserved or “fixed” and supported in some way whilst it is being cut. Broadly, there are two strategies that can be employed to provide this support:
- We can freeze the tissue and keep it frozen while we cut our sections. These sections are called “frozen sections”.
- Alternatively, we can infiltrate our tissue specimen with a liquid agent that can subsequently be converted into a solid that has appropriate physical properties, which will allow thin sections to be cut from it. Paraffin wax is such an agent. This produces so-called “paraffin sections”.
This article describes the method for processing tissue to create paraffin-embedded specimens ready for sectioning.
Introduction
“Tissue processing” describes the steps required to take an animal or human tissue from fixation to the state where it is completely infiltrated with a suitable histological wax and can be embedded ready for section cutting on the microtome.
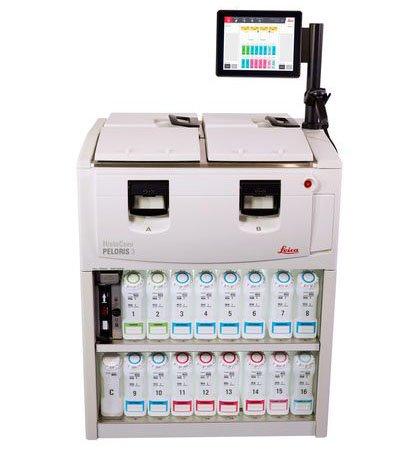
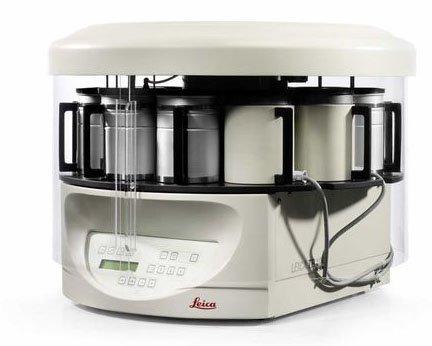
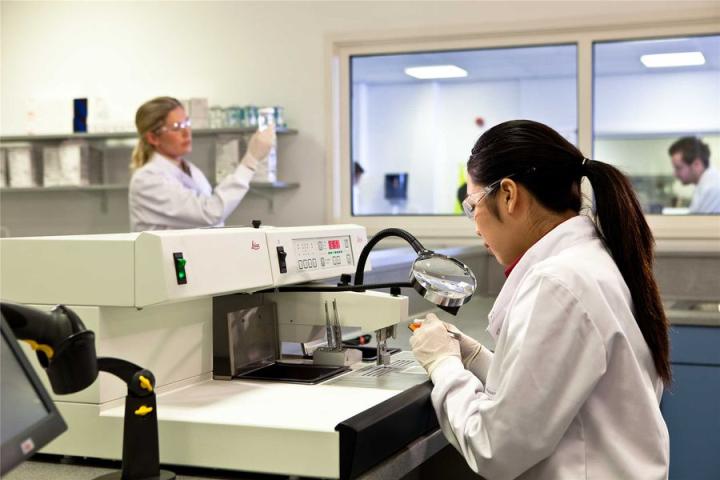
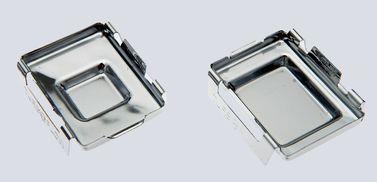
Tissue processing can be performed manually (hand processing), but where multiple specimens must be dealt with, it is more convenient and much more efficient to use an automated tissue processing machine (a “tissue processor”). These devices have been available since the 1940’s1 and have slowly evolved to be safer in use, handle larger specimen numbers, process more quickly, and to produce better quality outcomes. There are two main types of processors: the tissue-transfer (or “dip and dunk”) machines where specimens are transferred from container to container to be processed, and the fluid-transfer (or “enclosed”) types where specimens are held in a single process chamber or retort and fluids are pumped in and out as required. Most modern fluid-transfer processors employ raised temperatures, effective fluid circulation and incorporate vacuum/pressure cycles to enhance processing and reduce processing times.
Modern enclosed tissue processor

The importance of tissue processing
Most laboratory supervisors would emphasize to their staff the importance of tissue processing. It is worthwhile to stress that the use of an inappropriate processing schedule or the making of a fundamental mistake (perhaps in replenishing or sequencing of processing reagents) can result in the production of tissue specimens that cannot be sectioned and therefore will not provide any useful microscopic information. This can be disastrous if you are dealing with human diagnostic tissue where the whole of the specimen has been processed (“all in”). There is no spare tissue. There is no diagnosis. There is, however, a patient to whom an explanation has to be provided.
Although mechanical or electrical faults occasionally occur in tissue processors, processing mishaps where tissues are actually compromised mainly occur because of human error. It is important to emphasize the value of proper education and training for those carrying out tissue processing and the need to apply particular care when setting up a processor for any processing run.
Overview of the steps in tissue processing for paraffin sections
1. Obtaining a fresh specimen
Fresh tissue specimens will come from various sources. It should be noted that they can very easily be damaged during removal from the patient or experimental animal. It is important that they are handled carefully and appropriately fixed as soon as possible after dissection. Ideally, fixation should take place at the site of removal, perhaps in the operating theater, or, if this is not possible, immediately following transport to the laboratory.
2. Fixation
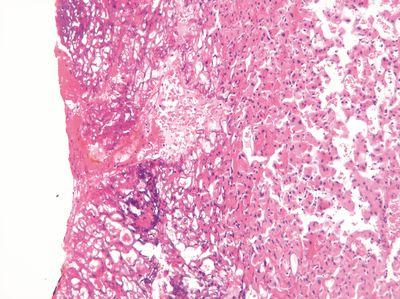
The specimen is placed in a liquid fixing agent (fixative) such as formaldehyde solution (formalin). This will slowly penetrate the tissue causing chemical and physical changes that will harden and preserve the tissue and protect it against subsequent processing steps.2 There are a limited number of reagents that can be used for fixation as they must possess particular properties that make them suitable for this purpose. For example, tissue components must retain some chemical reactivity so that specific staining techniques can be applied subsequently.3 Formalin, usually as a phosphate-buffered solution, is the most popular fixative for preserving tissues that will be processed to prepare paraffin sections. Ideally, specimens should remain in fixative for long enough for the fixative to penetrate into every part of the tissue and then for an additional period to allow the chemical reactions of fixation to reach equilibrium (fixation time). Generally, this will mean that the specimen should fix for between 6 and 24 hours. Most laboratories will use a fixative step as the first station on their processor.
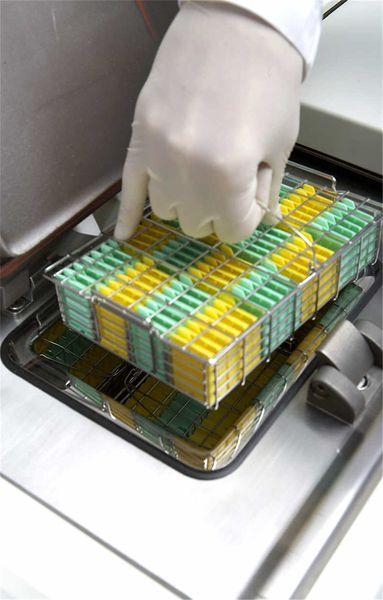
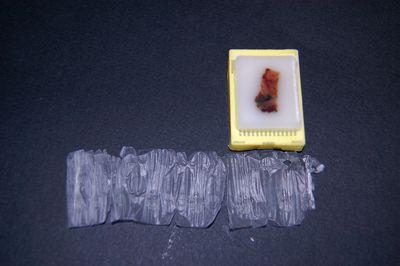
Following fixation, the specimens may require further dissection to select appropriate areas for examination. Specimens that are to be processed will be placed in suitably labeled cassettes (small perforated baskets) to segregate them from other specimens. The duration of the processing schedule used to process the specimens will depend on the type and dimensions of the largest and smallest specimens, the particular processor employed, the solvents chosen, the solvent temperatures, and other factors. The following example is based on a six-hour schedule suitable for use on a Leica Peloris™ rapid tissue processor.
3. Dehydration
Because melted paraffin wax is hydrophobic (immiscible with water), most of the water in a specimen must be removed before it can be infiltrated with wax. This process is commonly carried out by immersing specimens in a series of ethanol (alcohol) solutions of increasing concentration until pure, water-free alcohol is reached. Ethanol is miscible with water in all proportions so that the water in the specimen is progressively replaced by the alcohol. A series of increasing concentrations is used to avoid excessive distortion of the tissue.
A typical dehydration sequence for specimens not more than 4mm thick would be:
- 70% ethanol 15 min
- 90% ethanol 15 min
- 100% ethanol 15 min
- 100% ethanol 15 min
- 100% ethanol 30 min
- 100% ethanol 45 min
At this point, all but a tiny residue of tightly bound (molecular) water should have been removed from the specimen.
4. Clearing
Unfortunately, although the tissue is now essentially water-free, we still cannot infiltrate it with wax because wax and ethanol are largely immiscible. We, therefore, have to use an intermediate solvent that is fully miscible with both ethanol and paraffin wax. This solvent will displace the ethanol in the tissue, then this, in turn, will be displaced by molten paraffin wax. This stage in the process is called “clearing” and the reagent used is called a “clearing agent”. The term “clearing” was chosen because many (but not all) clearing agents impart an optical clarity or transparency to the tissue due to their relatively high refractive index. Another important role of the clearing agent is to remove a substantial amount of fat from the tissue, which otherwise presents a barrier to wax infiltration.
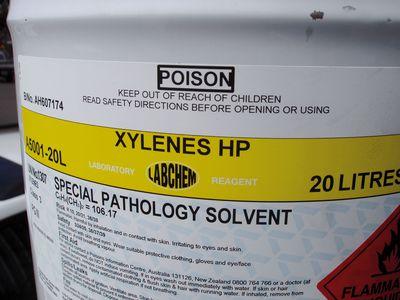
A popular clearing agent is xylene, and multiple changes are required to completely displace ethanol.
A typical clearing sequence for specimens not more than 4mm thick would be:
- xylene 20 min
- xylene 20 min
- xylene 45 min
5. Wax infiltration
The tissue can now be infiltrated with a suitable histological wax. Although many different reagents have been evaluated and used for this purpose over many years, the paraffin wax-based histological waxes are the most popular. A typical wax is liquid at 60°C and can be infiltrated into tissue at this temperature then allowed to cool to 20°C, where it solidifies to a consistency that allows sections to be consistently cut. These waxes are mixtures of purified paraffin wax and various additives that may include resins such as styrene or polyethylene. It should be appreciated that these wax formulations have very particular physical properties which allow tissues infiltrated with the wax to be sectioned at a thickness down to at least 2 µm, to form ribbons as the sections are cut on the microtome, and to retain sufficient elasticity to flatten fully during flotation on a warm water bath.
A typical infiltration sequence for specimens not more than 4mm thick would be:
- wax 30 min
- wax 30 min
- wax 45 min
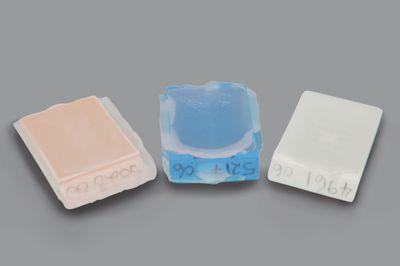
6. Embedding or blocking out
Now that the specimen is thoroughly infiltrated with wax, it must be formed into a “block” which can be clamped into a microtome for section cutting. This step is carried out using an “embedding center” where a mold is filled with molten wax and the specimen placed into it. The specimen is very carefully orientated in the mold because its placement will determine the “plane of section”, an important consideration in both diagnostic and research histology. A cassette is placed on top of the mold, topped up with more wax, and the whole thing is placed on a cold plate to solidify. When this is completed, the block with its attached cassette can be removed from the mold and is ready for microtomy. It should be noted that, if tissue processing is properly carried out, the wax blocks containing the tissue specimens are very stable and represent an important source of archival material.
“Xylene-free” processing
Although xylene is used widely as a clearing agent for tissue, processing it is a toxic reagent. Some laboratories prefer to use less-toxic alternatives such as isopropanol or other xylene substitutes. For this method to be successful, higher wax temperatures are required so that isopropanol can be eliminated from specimens during infiltration.
The combined effects of fixation and processing are to harden the tissue, and it is inevitable that shrinkage will also occur. It has been estimated that tissues shrink as much as 20% or more by the time they are infiltrated with wax4. Notwithstanding these effects, sections prepared from optimally processed tissues will consistently show excellent morphological detail, which allows comparisons to be made between specimens and accurate histopathological diagnoses to be determined.
In theory and practice, the paraffin blocks that will be easiest to section contain relatively homogenous tissue of uniform soft consistency (such as kidney), which, when infiltrated with wax, have a consistency similar to that of solidified wax alone (not containing tissue). Tissues of a dense or fibrous nature or a specimen where both hard and soft tissue are present in discrete layers can pose more of a challenge because parts of them are not so well-supported by the solidified wax. Differential shrinkage of the various elements in these blocks during fixation and processing contributes to the problems that might be experienced when they are being sectioned.
Steps to Better Processing and Embedding
From patient to pathologist, preparing tissue specimens for histological examination requires care, skill and sound procedures. This guide provides practical advice on best-practice techniques and simple ways to avoid common errors.
Tips for better tissue processing and embedding are highlighted in this guide. We hope each step provides a valuable reminder of good histology practice and helps with troubleshooting when unacceptable results do occur.
Want to see all 101 Steps to Better Histology?
Use an Appropriate Schedule
An appropriate schedule is chosen for the tissue type and size.
An inappropriate schedule is chosen. For example, a very long schedule for a small endoscopic biopsy or a very short schedule for a large, fatty breast specimen.
Provide Additional Fixation
For optimal processing and good morphology, tissue should be well fixed before processing. Where specimens are incompletely fixed, additional formalin fixation is provided in the processing schedule.
Incompletely fixed specimens go directly into alcohol producing zonal fixation formalin fixation for the outside of the specimen, alcohol fixation for deeper areas).
Maintain Reagent Quality
Processing reagents are replaced strictly according to established guidelines (ideally using our reagent management system in an advanced tissue processor such as Leica Biosystems PELORIS).
Guidelines for the placement of processing reagents are ignored, meaning that ineffective, contaminated or diluted reagents are used (e.g. “out-of-threshold” warnings from the PELORIS reagent management system are ignored). This can cause poor processing quality.
Use High-Quality Wax
High-quality wax is used for infiltration and especially for embedding (blocking out) to ensure high-quality blocks that are easy to cut.
Cheap, poor quality wax from little-known sources is used for infiltration and embedding. Poor quality wax produces blocks that are difficult to cut.
Avoid Hazardous Reagent
Where possible, xylene-free protocols are used (such as those available when using Leica Biosystems PELORIS). This provides a safer laboratory environment without compromising processing quality.
No consideration is given to the health effects of xylene use. The possibility of using alternatives has not been considered.
Orientate Specimens Carefully
Specimens are carefully orientated. Competent grossing ensures flat surfaces on most specimens. Staff performing embedding have ready access to each specimen description and are appropriately trained.
Orientation is incorrect. This can result in loss of tissue as re-embedding is required. Some poorly prepared specimens require extensive trimming on the microtome to obtain a full-face section.
Choose an Appropriate Mold
A mold of suitable size is always chosen for each specimen.
The same mold size is used for every specimen. Often the tissue touches the edge of the mold.

Handle Specimens Gently
Specimens are handled gently during embedding.
Specimens are handled forcefully during embedding to make them lie flat in the mold. Some tissue can be fractured by this process.
Avoid Excessive Heat
Before handling tissue, forceps are heated to the point where the wax just melts.
Forceps are heated well beyond the melting point of wax. This can cause local heat damage and a change in morphology in the area close to the contact point.
Check Temperatures Regularly
The temperature of the embedding center hot plate and wax reservoir is regularly checked.
The temperature of the embedding center hot plate is never checked. Even at this stage of processing, specimens can be damaged by excessive local heat.

Do Not Over-fill Molds
Molds are filled to an optimum level and do not overflow.
Molds are over-filled, requiring scraping of the back and edges of the cassette prior to microtomy. Over-filled blocks may sit unevenly in the microtome chuck, causing instability that may lead to the tissue becoming damaged during microtomy.
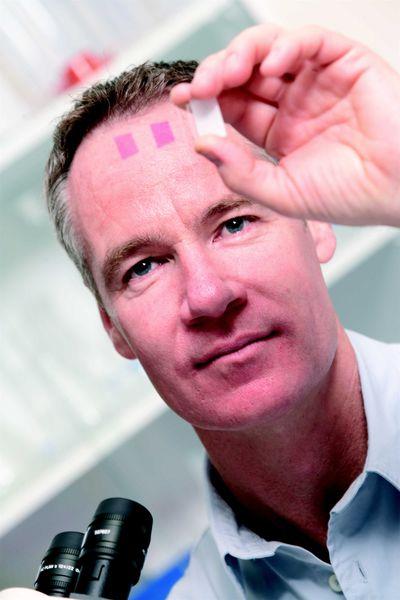
About the presenter
Geoffrey Rolls is a Histology Consultant with decades of experience in the field. He is a former Senior Lecturer in histopathology in the Department of Laboratory Medicine, RMIT University in Melbourne, Australia.
References
- Clayden EC. Practical section cutting and staining. Edinburgh: Churchill Livingstone, 1971.
- Hopwood D. Fixation and fixatives. In Bancroft J and Stevens A eds. Theory and practice of histological techniques. New York: Churchill Livingstone, 1996.
- Carson FL. Histotechnology. 2nd ed. Chicago: ASCP Press, 2007.
- Winsor L. Tissue processing. In Woods A and Ellis R eds. Laboratory histopathology. New York: Churchill Livingstone, 1994;4.2-1 - 4.2-39.
Leica Biosystems Knowledge Pathway content is subject to the Leica Biosystems website terms of use, available at: Legal Notice. The content, including webinars, training presentations and related materials is intended to provide general information regarding particular subjects of interest to health care professionals and is not intended to be, and should not be construed as, medical, regulatory or legal advice. The views and opinions expressed in any third-party content reflect the personal views and opinions of the speaker(s)/author(s) and do not necessarily represent or reflect the views or opinions of Leica Biosystems, its employees or agents. Any links contained in the content which provides access to third party resources or content is provided for convenience only.
For the use of any product, the applicable product documentation, including information guides, inserts and operation manuals should be consulted.
Copyright © 2026 Leica Biosystems division of Leica Microsystems, Inc. and its Leica Biosystems affiliates. All rights reserved. LEICA and the Leica Logo are registered trademarks of Leica Microsystems IR GmbH.