
Fixation and Fixatives (5) – Practical Procedures to Optimize Quality, the Effects of Heat, and Microwaves

In this final part of the "Fixation and Fixatives" series, we look at practical ways to optimize fixation quality, discuss how heat effects fixation, and finish with an introduction to the relatively new field of microwave fixation.
Practical procedures to optimize quality
By following simple, common sense principles, high quality, consistent fixation outcomes can be achieved. Here are three essentials to good fixation and twenty rules to follow to ensure they are achieved.
Essential 1: Fresh tissue
- Fix as soon as possible.
Remember that degeneration commences as soon as cells are deprived of a blood supply. - If fixation is not immediately possible, refrigerate, do not freeze.
Slow freezing of tissue will produce considerable damage due to the formation of ice crystals. - Fresh tissue may be infectious.
Consider any fresh or incompletely fixed tissue as potentially infectious to you and other workers in your lab. - Do not allow specimens to dry out.
Desiccation of specimen surfaces will cause permanent damage and may mask pathological change. Small endoscopic specimens are particularly susceptible to this type of damage. - Do not distort tissue.
Do not be rough with fresh tissue. Distortion or other mechanical damage will cause permanent morphological changes which can make interpretation difficult. - Label fully and accurately.
An absolute essential for diagnostic and research material.
Essential 2: Proper penetration of fixative
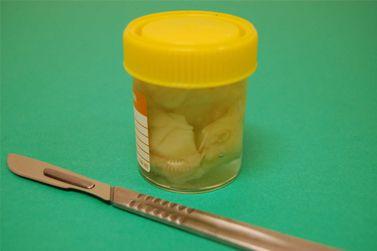
- Fixative should penetrate from all sides.
Always place specimens into containers that already contain fixative. This will prevent adhesion of the specimen to the container. - Cavities should be opened.
Where possible hollow organs or specimens with natural cavities should be opened to allow immediate access of fixative. - Perfusion of some specimens is advantageous.
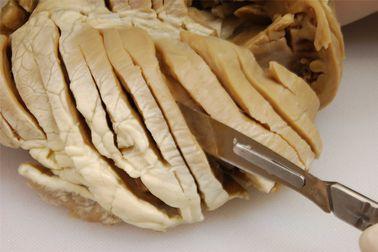
Fixation by perfusion of the vascular system of whole organs or small experimental animals may produce excellent results. - Thickness is important (4mm maximum).
The thickness of any specimen or tissue slice should not exceed 4 mm if optimal fixation is to be achieved. - Some agitation is useful.
Some occasional, gentle agitation (swirling) of the specimen during its first few minutes in fixative will aid penetration. - An adequate volume is vital (20:1 at least).
An excess of fixative is required as its effective components may be depleted as part of the reactions of fixation. - Allow sufficient time.
The fixative has to penetrate to the center of the densest part of the specimen, and then the chemical reactions of fixation have to take place. - Room temperature is best.
Initial fixation is best carried out at room temperature (20°C).
Essential 3: Right choice of a correctly formulated fixative
- Fixatives should be carefully made up from reagents of suitable quality, fresh if so specified.
Poor quality reagents can produce poor quality fixation. Some formulated fixatives should be made up from stock solutions immediately before use because they are unstable (eg., Helly’s fluid). - Specimens received in fixative should be checked and fixative replaced if necessary.
If a specimen is received in fixative of dubious quality, replace it with fresh fixative – it can only improve the results. - Fixatives should be used once only.
Specimens shed cells and tissue fragments into the fixative solution which could contaminate any subsequent specimen. In addition, components are used up during the reactions of fixation. - Avoid metal lids.
Some fixatives are highly corrosive and will attack metals (e.g., mercury salts). - A suitable treatment following fixation should be applied.
Some fixatives require that specimens be washed in water prior to processing (eg., Zenker or Helly) or some other requirement may exist (phosphate may precipitate from buffer in concentrations of alcohol of greater than 70%). - All fixatives are toxic and irritant.
In order for a fixative to fix, it must be toxic and is likely to be irritant, although they do vary in extent. Anyone using fixatives should be aware of the potential hazards.
Starting points for processing and post fixation techniques
The following table indicates the starting point for paraffin processing for each of the fixatives mentioned in the fourth part of the Fixation and Fixatives series.
Starting points for processing and post-fixation requirements.
|
Fixative |
Post-fixation treatment required |
Commence processing in |
Comment |
|
Phosphate buffered formalin |
None |
Additional fixation in buffered formalin if required, otherwise 70% ethanol |
Placing specimens in alcohol concentrations greater than 70% may cause precipitation of phosphate from the buffer solution. |
|
Formal calcium |
none |
70% ethanol |
|
|
Formal saline |
None |
Additional fixation in formal saline if required, otherwise 70% ethanol |
|
|
Zinc formalin (unbuffered) |
Brief rinse in water |
Additional fixation in formalin if required, otherwise 70% ethanol. |
Rinse removes excess zinc salts which may be corrosive. If phosphate buffered formalin is used in station 1, residual zinc salts can form a precipitate. |
|
Zenker’s fixative |
Thorough rinse in water |
70% ethanol |
Rinse removes chromate which can otherwise form an insoluble precipitate. Sections must be treated to remove mercury pigment prior to staining. |
|
Helly’s fixative |
Thorough rinse in water |
70% ethanol |
Rinse removes chromate which can otherwise form an insoluble precipitate. Sections must be treated to remove mercury pigment prior to staining. |
|
B-5 fixative |
After fixation, store in 70% ethanol prior to processing |
70% ethanol |
Sections must be treated to remove mercury pigment prior to staining. |
|
Bouin’s solution |
After fixation, store in 70% ethanol prior to processing |
70% ethanol |
Water washing after Bouin fixation may remove some soluble picrates. These are insoluble after alcohol treatment. |
|
Hollande’s |
Brief wash in water |
Additional fixation in buffered formalin if required, otherwise 70% ethanol. |
Water wash required. If phosphate buffered formalin is used in station 1, residual salts can form an insoluble phosphate precipitate. |
|
Gendre’s solution |
Wash with 80% alcohol to remove excess picric acid |
80% alcohol |
Residual picric acid can adversely affect staining. |
|
Clarke’s solution |
None |
80% ethanol |
|
|
Carnoy’s solution |
None |
absolute ethanol |
Fixation should not be prolonged as excessive hardening will result. |
|
Methacarn |
None |
absolute ethanol |
Fixation should not be prolonged as excessive hardening will result. |
|
Alcoholic formalin |
None |
absolute ethanol |
|
|
Formol acetic alcohol |
None |
absolute ethanol |
|
Effect of heat during fixation
When the temperature of a fixative is raised or lowered (as is sometimes recommended for particular histochemical procedures), the rate of diffusion into the specimen is affected, as is the rate of the chemical fixation reactions occurring with the various tissue components. Increasing temperature accelerates the process of fixation. Excessive heat, particularly if it is prolonged, can damage cells and cause substantial shrinkage and hardening of the specimen.
In the days before the widespread use of the cryostat, it was standard practice to rapidly fix small specimens in boiling formalin prior to preparing frozen sections using the freezing microtome. This process produced specimens which could be sectioned, but showed indifferent and very variable microscopic results, apart from often exposing the microtomist to unacceptable levels of formaldehyde vapor.
Today most laboratories carry out primary fixation of specimens at ambient temperature and only after specimens are loaded onto the processor, where staff have some protection from the vapors produced, would fixative temperatures be increased. Temperatures of between 37°C and 45°C are commonly employed.
Another problem of using hot fixative solutions to initially fix larger specimens (greater than 3mm thick), is that the outside of the specimen fixes rapidly while it may take quite some time for the fixative to penetrate to the center of the block and this area may be poorly fixed or not fixed at all. Blocks then show an exaggerated “zonal” fixation effect with different morphological and staining characteristics on the outside as compared to the inside of the specimen. It is for these reasons that microwave fixation is used in some laboratories
Microwave fixation
Microwave heating as a means of tissue fixation was first reported in 1970. 1 From this time, there has been increasing use of microwave ovens in histopathology for this and other purposes such as antigen retrieval and accelerated staining of sections.
Broadly there are two ways in which microwave technology is used for tissue fixation. Fresh tissue, placed in saline or other isotonic solution, can be irradiated to produce primary fixation (referred to as “microwave fixation” 2, 3, or “microwave stabilization” 4). No chemical fixative is used at this stage. Alternatively, specimens can be placed in buffered formalin or some other fixative and, at a later stage, microwaved to assist the fixative action of the fixing agent (referred to as ‘microwave-assisted fixation”). 5-10 In this latter case, the microwaving may be carried out while the tissue is in fixative, in which case there may be some hazard from toxic fumes produced, or the tissue is transferred back to saline or buffer for the microwave step. Either way, fixative solution must be present within the tissue for microwave-assisted fixation to occur. Microwave-assisted fixation is much more commonly used than primary microwave fixation. Proprietary fixatives of relatively low toxicity containing glyoxal, have been developed for use in microwave-assisted fixation.
Microwaves are a form of non-ionizing radiation produced by the magnetron in domestic and scientific microwave ovens. At a frequency of 2.5 GHz, they have the capacity to generate instantaneous heat when dipolar molecules such as water or polar side chains of proteins are exposed to their alternating magnetic fields at 2.5 billion cycles per second. The rate at which the microwave energy will generate heat during tissue fixation depends on a number of factors including the power setting and power output of the oven, the volume and nature of the holding solution, the composition, shape and number of containers (including cassettes), the agitation or movement of the containers, and the number, volume and dimensions of the specimens being fixed. According to Kok and Boon, 2.5 GHz microwaves have little effect on tissue beyond a depth of 4 cm and for primary microwave fixation tissue slices should not exceed 3 cm in thickness. After microwaving, they should immediately be sliced to 2 mm and placed in 70% ethanol. 4 For microwave-assisted fixation Leong suggests 2 mm thick slices should be prepared from tissues initially fixed in formalin prior to microwave treatment. 11 Because of the many variables involved in microwave fixation, it is vital that every aspect of the technique is fully standardized (including consistent specimen dimensions), that the microwave oven is properly calibrated and that staff performing the fixation step fully understand the factors that will influence the outcome. 11-13
Heat is considered to be the major factor responsible for the effects of microwaves during tissue fixation. Apart from increasing diffusion rates, heat will increase molecular kinetics and speed up chemical reactions. There has been considerable discussion as to what other effects microwaves might have including the degradation of the oligomers in aldehyde fixatives to dimers and monomers, field-induced alterations in macromolecular hydrogen bonding, proton tunneling and disruption of bound water. 11 It appears to be necessary to achieve a temperature in excess of 60°C within the specimen for primary microwave fixation, while lower temperatures may be acceptable for microwave-assisted fixation. 11, 14
About the presenter
Geoffrey Rolls is a Histology Consultant with decades of experience in the field. He is a former Senior Lecturer in histopathology in the Department of Laboratory Medicine, RMIT University in Melbourne, Australia.
Referenzen
- Mayers CP. Histological fixation by microwave heating. J Clin Pathol 1970;23;273-275.
- Leong AS, Duncis CG. A method of rapid fixation of large biopsy specimens using microwave irradiation. Pathol 1986;18;222-225.
- Leong AS. Microwave fixation and rapid processing in a large throughput histopathology laboratory. Pathol 1991;23;271-273.
- Kok LP, Boon ME. Microwave cookbook for microscopists. Leiden: Coulomb Press Leiden, 1992.
- Margo CE, Saxe S, Grossniklaus HE. Microwave-stimulated chemical fixation of whole eyes. Ophthalmology 1992;99;1117-1122.
- Suurmeijer AJ, Boon ME, Kok LP. Notes on the application of microwaves in histopathology. Histochem J 1990;22;341-346.
- Kayser K, Stute H, Lubcke J, Wazinski U. Rapid microwave fixation - a comparative morphometric study. Histochem J 1988;20;347-352.
- Mac-Moune LF, Lai KN, Chew EC, Lee JC. Microwave fixation in diagnostic renal pathology. Pathol 1987;19;17-21.
- Ainley CD, Ironside JW. Microwave technology in diagnostic neuropathology. J Neurosci Methods 1994;55;183-190.
- Ruijter ET, Miller GJ, Aalders TW et al. Rapid microwave-stimulated fixation of entire prostatectomy specimens. Biomed-II MPC Study Group. J Pathol 1997;183;369-375.
- Leong AS-Y. Fixation and fixatives. In Woods AE and Ellis RC eds. Laboratory histopathology. New York: Churchill Livingstone, 1994;4.1-1 - 4.1-26.
- Login GR. Editorial: the need for clinical laboratory standards for microwave-accelerated procedures. J Histotechnol 1998;21;7-9.
- Buesa RJ. Haven't you calibrated your microwave oven yet? J Histotechnol 2002;25;39-43.
- Lemire TD. Microwave irradiated canine and feline tissues: Part 1. Morphologic evaluation. J Histotechnol 2000;23;113-120.
Related Content


Die Inhalte des Knowledge Pathway von Leica Biosystems unterliegen den Nutzungsbedingungen der Website von Leica Biosystems, die hier eingesehen werden können: Rechtlicher Hinweis. Der Inhalt, einschließlich der Webinare, Schulungspräsentationen und ähnlicher Materialien, soll allgemeine Informationen zu bestimmten Themen liefern, die für medizinische Fachkräfte von Interesse sind. Er soll explizit nicht der medizinischen, behördlichen oder rechtlichen Beratung dienen und kann diese auch nicht ersetzen. Die Ansichten und Meinungen, die in Inhalten Dritter zum Ausdruck gebracht werden, spiegeln die persönlichen Auffassungen der Sprecher/Autoren wider und decken sich nicht notwendigerweise mit denen von Leica Biosystems, seinen Mitarbeitern oder Vertretern. Jegliche in den Inhalten enthaltene Links, die auf Quellen oder Inhalte Dritter verweisen, werden lediglich aus Gründen Ihrer Annehmlichkeit zur Verfügung gestellt.
Vor dem Gebrauch sollten die Produktinformationen, Beilagen und Bedienungsanleitungen der jeweiligen Medikamente und Geräte konsultiert werden.
Copyright © 2026 Leica Biosystems division of Leica Microsystems, Inc. and its Leica Biosystems affiliates. All rights reserved. LEICA and the Leica Logo are registered trademarks of Leica Microsystems IR GmbH.