
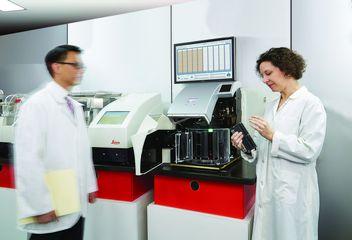
Four Tips for Digital Pathology Slide Scanning
Do you want to get better digital images from your glass slides? Here are some tips to help you get the best out of your digital pathology line scanner:
TIP 1: Tissue Preparation

It’s vital to have well-prepared tissue – the best digital scanner can’t compensate for poor samples. Here are some aspects of tissue preparation that can affect the digitization process.
- Cutting – Digital pathology scanners have a smaller range of focus than a traditional microscope, so keep this in mind. When scanning single-plane images, standard tissue thickness (3 – 5 μm) will give best results. For thick sections, multi-plane (z-stack) scanning may be necessary.
- Staining – Very faint staining or excessive background staining will make it more difficult for the scanner to automatically identify the tissue, and may mean more manual work.
- Mounting – As with traditional microscopy, digital pathology scanners work best on flat tissue surfaces. Avoid folds or wrinkles in the tissue for optimal focus.
- Coverslipping – Glass coverslips are preferable if you plan to scan the slide, as plastic coverslips may warp over time and affect scanner focus. As with traditional microscopy, ensure that no air bubbles are trapped under the coverslip, to prevent areas being scanned out of focus.
TIP 2: Slide Inspection & Preparation

To improve results with your slides, always check and clean them before scanning.
- Inspect slides for overhanging labels, tape, or excess mounting medium that may affect the fit of the slide in the scanning mechanism and impede operation.
- Carefully wipe slides down with a soft cloth (e.g. microfiber) to remove loose debris, water spots, or fingerprints from the upper and lower surface. For difficult stains, dampen the cloth with water or alcohol solution to clean.
- Check for cracks or chips in the slide, particularly at the corners. Any loose glass shards could fall off during scanning and damage the scanning mechanism.
- Wait until slides are fully dry before loading into the scanner, to avoid residue getting on the scanner mechanism.
- Ensure slides are placed flat into the scanner rack or carrier, and any securing mechanism engaged. If the slide is not flush during scanning, there is a high likelihood of unfocused areas in your scan. Labels on the bottom of the slide may prevent the slide flaying flat, so ensure these are only placed on the top-facing side of the slide.
TIP 3: Scanning your Slide
Each digital pathology scanner model has its own workflow and requirements. However, there are some general guidelines to follow in order to get a good scan.
- The scanner should automatically detect all the tissue on the slide, while excluding non-relevant objects such as labels, pen marks, or debris. However faint tissue staining, excessive background staining, mounting media discoloration, or excessive debris / marks on slides can lead to poor tissue detection. If possible, review the tissue detection on suboptimal slides prior to high resolution scanning, to avoid the need for rescans later.
- Focusing should be automatic, and focus points – if present – should be evenly distributed over the tissue. If areas of the slide are not scanning in focus, try placing additional focus points manually.
- Avoid placing focus points on areas where there is debris on / under the coverslip, air bubbles, or other defects. These may cause the scanner to focus on the incorrect scanning plane, leading to out-of-focus tissue.
- For oil scanning at higher magnifications, ensure that enough oil is applied before scanning to prevent the objective drying out during the scanning process, which can leave “streaking” artifacts on the scanned image. However too much oil can seep under the cover slip, leaving a “glazed” appearance on the scan with poor contrast along cell edges. Test scans are a good practice with oil scanning. Be sure to clean up any oil residue on the racks or scanning mechanism after scanning.
TIP 4: Quality Control (QC)
Despite all your efforts, not every scan will be acceptable first time. QC processes will vary per lab, and you should always follow the QC requirements of your institution. However, here are some steps you can follow for quick and efficient scan QC in your image viewer.
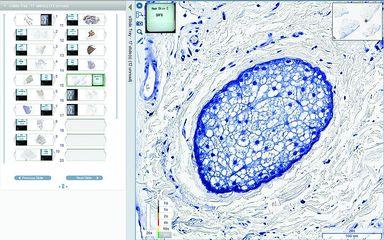
- Review the whole slide – or at least the entire scanned tissue area – at a low magnification (e.g. 4x), checking for visible out-of-focus areas or misalignment. Misalignment will typically be visible as a “stitch line” through the image, where the scanned stripes that make up the full image meet.
- Zoom into the magnification at which the high resolution image was captured, and review in a single horizontal path across the tissue section at its widest point, one field of view at a time. This will allow you to check for smaller areas of poor focus or subtler misalignment.
- Perform the same field-by-field review in the vertical direction, from one edge of the tissue to the other in an unbroken line, checking again for any out-of-focus areas.
- Spot check a few areas in the slide at high magnification, particularly any regions where the tissue is a different thickness or where there are any defects in the slide. These are the areas most likely to have poor focus.
Follow these simple guidelines when scanning, to help you produce higher quality digital images and give you a permanent record of your slides that you can view, share, and analyze.
Related Content

Leica Biosystems content is subject to the Leica Biosystems website terms of use, available at: Legal Notice. The content, including webinars, training presentations and related materials is intended to provide general information regarding particular subjects of interest to health care professionals and is not intended to be, and should not be construed as, medical, regulatory or legal advice. The views and opinions expressed in any third-party content reflect the personal views and opinions of the speaker(s)/author(s) and do not necessarily represent or reflect the views or opinions of Leica Biosystems, its employees or agents. Any links contained in the content which provides access to third party resources or content is provided for convenience only.
For the use of any product, the applicable product documentation, including information guides, inserts and operation manuals should be consulted.
Copyright © 2025 Leica Biosystems division of Leica Microsystems, Inc. and its Leica Biosystems affiliates. All rights reserved. LEICA and the Leica Logo are registered trademarks of Leica Microsystems IR GmbH.