
Immunoistochimica: Panoramica + Procedure per una migliore colorazione IHC


Immunohistochemistry: An Overview + Steps to Better IHC Staining
Immunohistochemistry (IHC) is used in histology to detect the presence of a specific protein marker that can assist with accurate tumor classification and diagnosis. This guide illustrates the basic steps used to create an IHC stain.
An Introduction to Immunohistochemistry
Immunohistochemistry (IHC) is used in histology to detect the presence of specific protein marker that can assist with accurate tumor classification and diagnosis. This guide illustrates the basic steps used to create an IHC stain.
An Introduction to IHC Staining
IHC is used in histology to detect the presence of specific protein markers that can assist with accurate tumor classification and diagnosis. IHC has evolved to complement the Hematoxylin & Eosin (H&E) and Special Stain techniques that typically show tissue morphology (structure). Where H&E and Special Stains are non-specific, IHC is directed to a specific protein marker or markers. IHC is used as a diagnostic tool to assist in the diagnosis of solid tumors and cytological specimens and has been used as a mainstream diagnostic tool for almost half a century.
Target Antigen
Antigens are proteins that are within or on the surface of a cell. Pathologists look for the presence or absence of particular antigens to assist with diagnosis.
There are many hundreds of antigens that have been found to be diagnostically useful. Often, a pathologist will use a “panel” of multiple antigens to help fully classify a particular tumor.
Primary Antibody
The first stage of IHC is the application of a primary antibody that binds specifically to the target antigen.
There are two main types of antibody, polyclonal and monoclonal. Polyclonal antibodies have an affinity with, and bind to, multiple epitopes (or parts) or the target antigen, and as such are more prone to cross-react to non-target antigens.
Monoclonal antibodies have an affinity to only one epitope and tend to produce cleaner, more specific staining but are less sensitive or intense.
Secondary Antibody
Next, secondary antibodies bind to the primary antibody. This is known as indirect IHC. It is now commonly used as multiple secondaries can bind to a single primary to amplify the staining intensity.
The Detection System
The detection system builds on the secondary. Modern chromogenic detection utilizes enzymes such as Horseradish Peroxidase (HRP) that are conjugated (joined) to an antibody. Multiple enzymes attached to the antibody are known as polymers, and they again produce more intense staining as there are more molecules for the chromogen to attach.
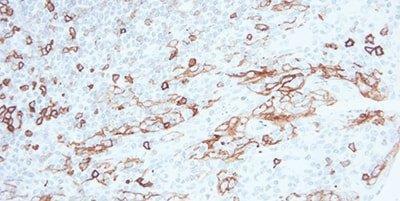
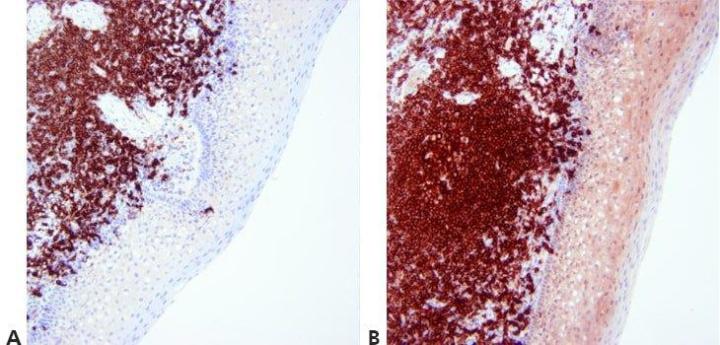
The Chromogen
Finally, a substrate forms an insoluble colored precipitate that can be visualized under a microscope. There are two commonly used chromogens: DAB (brown) or AP (red).
DAB is used for most applications as it provides strong and permanent stains. AP Red (or another red chromogen) is used mainly for skin sections where the brown DAB may be masked by brown melanin pigment.
Both DAB and AP Red are sometimes used in the same tissue section to allow the pathologist to visualize two antigens in the one slide. This is a process known as double staining.
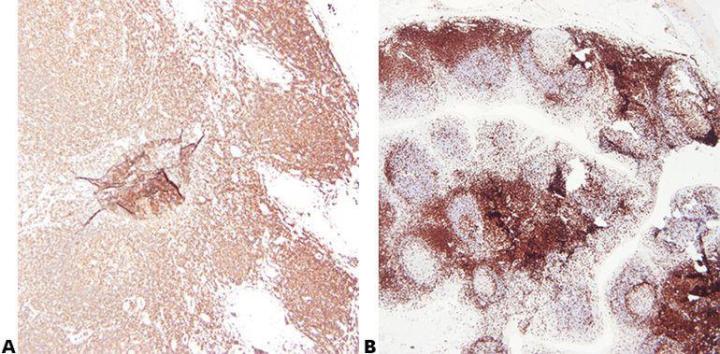
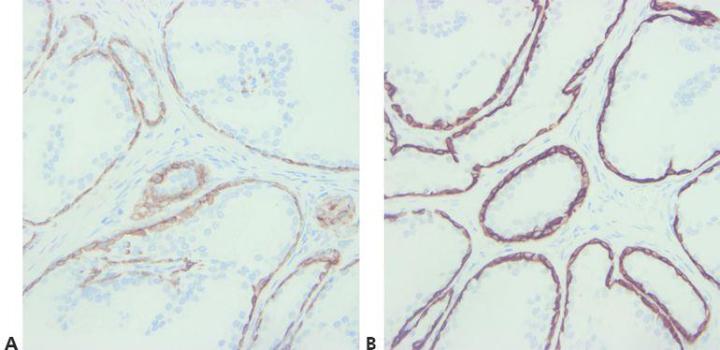
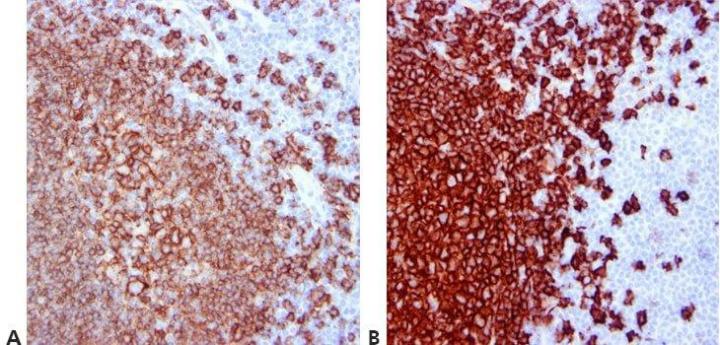
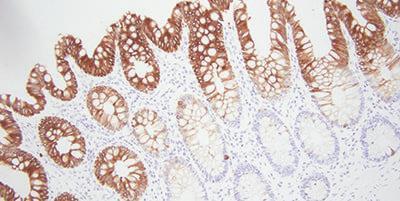
A Completed IHC Stain
This is a typical IHC stain where the brown precipitate indicates the presence of the target antigen – in this case, Cytokeratin 5 on a prostate biopsy. The amount of staining, the staining pattern, and the location of staining (cell cytoplasm nucleus or membrane) all provide information for the diagnosing pathologist.
The blue background is a hematoxylin counter-stain that is often applied after the chromogen. The counter-stain provides a contrast to the chromogen and also helps the pathologist visualize the underlying tissue structure.
15 Steps to Better IHC
From patient to pathologist, preparing tissue specimens for histological examination requires care, skill, and sound procedures. This guide provides practical advice on best-practice techniques and simple ways to avoid common errors.
Tips for better IHC are highlighted in this section. We hope each step provides a valuable reminder of good histology practice and helps with troubleshooting when unacceptable results do occur.
Want to see all 101 Steps to Better Histology?
Click here to download 101 Steps to Better Histology now!
Step 1 - Use High Quality Sections
Take particular care to use thin, flat sections that have been thoroughly dried onto the slide. Preferably use charged slides or APES coated slides for IHC.
Uneven, poorly-adhering sections stain unevenly with variable background staining.
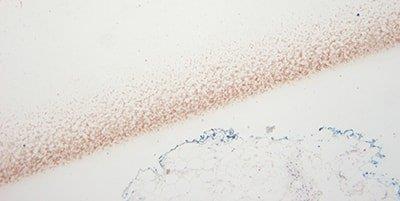
Step 2 - Ensure Optimal Fixation
Good quality fixation using known and consistent fixation conditions (fixative type, pH, temperature, time) produces the best results. Specimens should be checked prior to processing to determine if further fixation is required.
Inconsistent fixation conditions, producing under-fixed or over-fixed tissues, produce variable results and make troubleshooting difficult.
 ha provocado una tinción irregular en esta sección (tumor mamario, ER).")
Step 3 - Avoid Section Adhesion Problems
Avoid the use of protein-based section adhesives in the flotation bath (glue, starch, or gelatin), particularly on charged slides.
Protein-based adhesives can block the surface of the charged slide. This causes inconsistent adhesion and leads to uneven staining due to the pooling of IHC reagents beneath lifting sections.
Step 4 - Avoid Concentration Gradients
Concentration gradients are avoided by careful application of reagents.
“We sometimes see strong staining at one end of the slide progressing to weak staining at the other.”
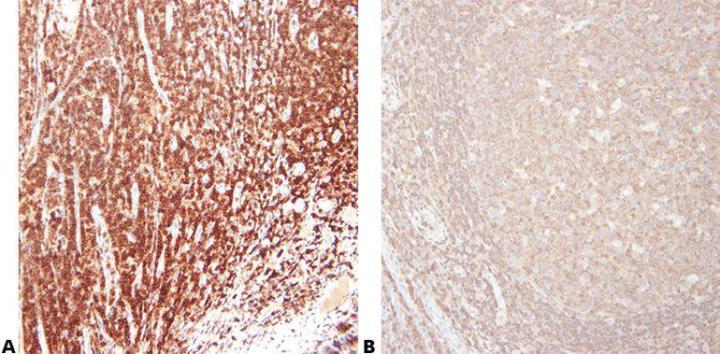
Step 5 - Choose Antibody Carefully
Choose your primary antibody carefully with regard to its sensitivity and specificity. Be aware that antibodies sold by different suppliers often come from the same source and are repackaged/branded for sale. It is important to use the clone name when assessing an antibody.
“We buy our antibodies based on price alone.”
. In each case, the recommended pretreatment and optimized dilution were used. There is an obvious difference in the quality of the results achieved.")
Step 6 - Read Specification Sheets
Know your primary antibody. Always check the specification sheet to determine the suitability of your method for a particular antibody. Specification sheets should be updated when a new batch of antibody is purchased.
“We don’t have access to the antibody specification sheets in our laboratory.”
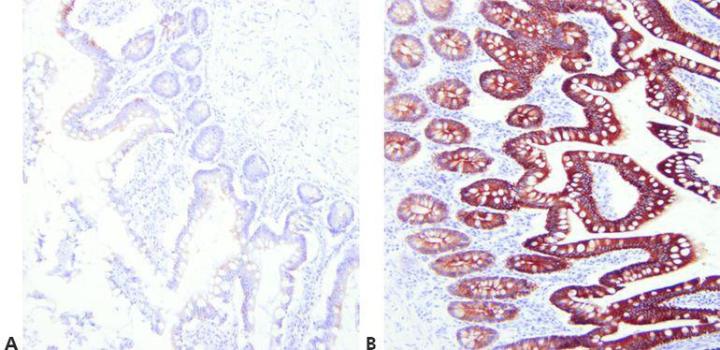
Step 7 - Optimize Retrieval Methods
Choose appropriate unmasking conditions for the primary antibody being used, the tissue being stained, and the fixation employed (pH, reagent, reaction conditions).
The same retrieval technique is used for all primaries on the assumption that there is a successful universal HIER method.
Step 8 - Consider Antibody Cross-reactivity
Be aware of any potential problems with antibody cross-reactivity (read the specification sheet).
No attempt is made to explain unexpected positive staining.
Step 9 - Block Endogenous Peroxidase
For peroxidase-based detection systems, always use a peroxidase-blocking step.
Non-specific staining is often seen in erythrocytes, granulocytes, monocytes, and in muscle. This is due to incompletely-blocked endogenous peroxidase.
Step 10 - Avoid Background Staining
Appropriate protein block is always used.
Generalized background staining is sometimes seen due to ineffective protein block.
Step 11 - Use an Appropriate Detection System
Choose an appropriate detection system that will provide precise, specific staining with adequate sensitivity.
“We have been using the same detection system for a long time and see no reason to change. Sometimes our stains are weak and are not as sharp as we would expect.”
Step 12 - Standardize Washing Steps
Use standardized washing steps throughout (duration, volume, and form of agitation). This will ensure the consistency of results.
Results are very variable within runs with the same antibody and between runs on different days. This can be due to different washing techniques used by different operators.
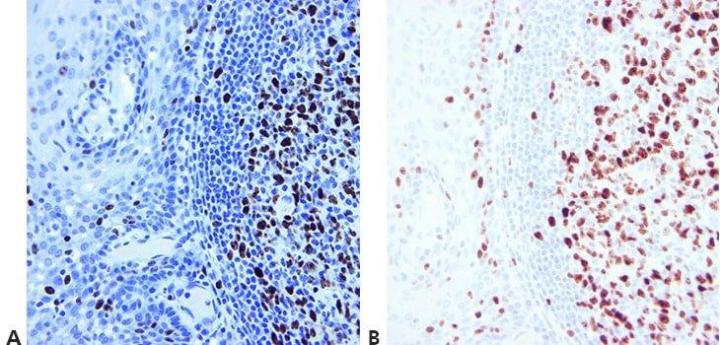
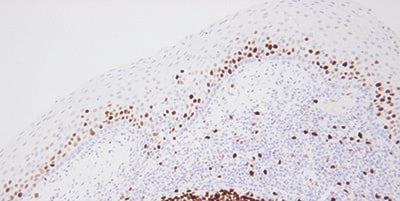
Step 13 - Optimize Counterstaining
The level of nuclear counterstain is carefully regulated and standardized so as not to obscure positive staining. The counterstain should provide the best possible contrast between chromogen and background tissue elements. An appropriate counterstain is chosen for the chromogen used.
Nuclear counterstain is sometimes very strong. This can obscure weak specific staining.
Step 14 - Use Appropriate Controls
Always use appropriate positive and negative controls that are carefully examined to validate results. Internal positive and negative controls are also important and provide an excellent means of ensuring quality assurance in IHC .
“We only do controls when our method doesn’t seem to work. If we did them for every run, people wouldn’t bother to look at them.”
Step 15 - Evaluate Results Carefully
Know what to look for and where to look when evaluating your test sections and controls after staining.
If staining is observed in test sections, it is assumed the stains are satisfactory.
Bonus tip: Choosing the Right Antibodies
A simple, but sometimes overlooked step is to choose antibodies that work for immunohistochemistry. This can save you a lot of headaches down the road. Search for specific antibodies from literature, vendors, as well as your peers.
There are several things to keep in mind with antibodies. What might work well in one laboratory might not be optimal for your laboratory. Each antibody needs to be tested with your staining system. Antibodies over time can lose their staining intensity. Exposure to air and light can cause this.
Concentrates versus RTU antibodies
When selecting antibodies, there are two main options to consider; a concentrated format or a pre-diluted, Ready-To-Use (RTU) format. Concentrates are flexible, have a lower initial purchase price, and can generally be used within any staining system, both automated and manual, subject to the manufacturer’s recommendations. The working dilution of concentrates can be optimized to balance cost, staining time, and quality. Given the large working dilution range, concentrates can be varied at any time to accommodate changes to laboratory practice or for multiple protocols for a particular antibody. However, concentrates do require preparation time and validation. As there is no definitive way of determining the properties and stability of a diluted antibody without well controlled and executed studies, staining quality may be compromised as subtle deteriorations may not be noticed. The advantages of RTUs include increased laboratory efficiency, better quality control, and easier reagent management. They eliminate time spent on working dilution, preparation, and the time to validate the assay. Consistency is enhanced with run-to-run variation reduced, especially in conjunction with automated stainers and associated detection systems. With a defined number of tests and manufacturer-verified expiry, RTUs simplify antibody management. Additionally, RTUs can contribute to laboratory growth by making it easy to adopt new antibody assays as the amount of validation work is greatly reduced.
Bonus tip: Pre-staining standardization is critical
Any pathologist, lab manager, or histotechnologist will readily acknowledge that preparation for
IHC
staining begins the moment tissue is acquired. The literature documents optimal conditions for tissue fixation, processing, and sectioning to ensure morphology and antigenicity are maintained. Further improvements in maintaining consistency to correctly control for these factors could be pursued. This may involve a laboratory establishing itself at the site of collection, recognizing that accessioning and sample preparation begins here.
Automated accession,
LIS
, and sample tracking infrastructure should extend out of the laboratory and into surgery/point of biopsy, enabling standardized prep-equipment (“controlled” pots, fixatives) to be monitored for optimal processing downstream. A parallel industry that recognized this value is the blood analysis laboratory, which utilizes standardized coated collection vials with barcoded patient information for tracking and accessioning.
Linking fixation, tissue processing, and
IHC
staining will add value to control quality. Laboratories that can monitor and record fixation and tissue processing conditions and link these with
IHC
staining protocols will be able to report a diagnosis under a tighter quality controlled environment. The frequent use of controls for pre-processing variability (e.g., control every 100 slides) may also provide a good measure for staining instrument tolerances and performance. These workflows and technologies will evolve as the
IHC
industry matures. However, there are a number of good practices that are known to establish and maintain high quality and consistent results from
IHC
staining (refer to table below).
| Process | Location | Common Issues that Impact IHC |
|---|---|---|
|
Excision/Biopsy |
Surgery/Physician Office |
Mechanical tissue damaged by excision equipment |
|
Accessioning |
Laboratory |
Sample mislabeling |
|
Grossing |
Laboratory |
Slices too thick |
|
Tissue processing |
Laboratory |
Poor decalcification (where required) |
|
Embedding |
Laboratory |
Incorrect orientation |
|
Microtomy |
Laboratory |
Poor quality knife or incorrect knife profile |
|
Flotation |
Laboratory |
Dirty or contaminated water |
About the presenters
James Anderson is a Global Marketing Manager at Leica Biosystems with experience with histology and scientific, technical, and marketing communications.
Geoffrey Rolls is a Histology Consultant with decades of experience in the field. He is a former Senior Lecturer in histopathology in the Department of Laboratory Medicine, RMIT University in Melbourne, Australia.

Steven Westra is a renowned antibody staining consultant with over ten years of experience in the immunohistochemistry industry.
Leica Biosystems Knowledge Pathway content is subject to the Leica Biosystems website terms of use, available at: Legal Notice. The content, including webinars, training presentations and related materials is intended to provide general information regarding particular subjects of interest to health care professionals and is not intended to be, and should not be construed as, medical, regulatory or legal advice. The views and opinions expressed in any third-party content reflect the personal views and opinions of the speaker(s)/author(s) and do not necessarily represent or reflect the views or opinions of Leica Biosystems, its employees or agents. Any links contained in the content which provides access to third party resources or content is provided for convenience only.
For the use of any product, the applicable product documentation, including information guides, inserts and operation manuals should be consulted.
Copyright © 2024 Leica Biosystems division of Leica Microsystems, Inc. and its Leica Biosystems affiliates. All rights reserved. LEICA and the Leica Logo are registered trademarks of Leica Microsystems IR GmbH.